Showing posts with label beauty. Show all posts

Monday, 30 September 2013

Bee's Daily Skincare Routine ❤


My daily skincare routine was once non-existent and I will admit I used to wash my face with baby wipes (this is a terrible idea because it dries out and destroys your skin). So I've learnt the right way to properly clean your face to ensure better results!

Step 1: Eye Make-Up Remover
You only need to do this step if you are taking off your make-up but what I do is I put the eye make up remover onto cotton wool and gently rub it onto my eyelids and around my eyes being very careful because your eyes are very sensitive. I then get a cotton bud and place another piece of cotton wool directly under the eye with the eye closed to wipe the mascara off with the cotton bud onto the cotton wool. 

Step 2: Cleanser
When I'm in a rush I find that even just using cleanser is beneficial in itself with the removal of make up and cleaning your skin. I put some cleanser onto my clean hands and gently massage it around my face massaging it into certain areas and making sure I'm fully removing the makeup. I then get two very slightly damp pieces of cotton wool and remove the cleanser bringing with it the excess makeup. I usually do this twice to make sure my makeup is completely gone

Step 3: Toner
Toner is very good because it closes any open pores and gets rid of excess makeup. I just simply apply some toner to a piece of cotton wool and rub it around my face focusing on any open pores or spots. Be careful though if it is your first time using toner in a while it can stung but this usually wares off after a few uses but if it doesn't it means your skin is having a chemical reaction to it so make sure you get one suited to your skin type!

Step 4: Moisturiser
This is my favourite part of my skin care routine because it allows your skin to become more soft and supple. I just add a small amount to my hands and gently massage it into my skin avoiding the areas around my eyes. 

Step 5: Eye Gel
Because the skin around your eyes is 5 times more sensitive than the skin on your face you must use an eye gel instead of moisturiser. I just put a pea size amount of it on my finger and dab it onto the area around my eyes keeping my eyes closed.

Because we all have different skin types I can't recommend any specific type of cleanser, toner etc because each skin type requires a different product i.e someone with dry skin should get an oil based product for their skin.

However the products I use are from the "Hair and Beauty Salon" shops located around Ireland and they are suitable for all skin types depending on whether you have any skin allergies etc. Kaeso Beauty is the name of the products and they are big tubes that have lasted me ages and will last for months or even a year so they are very cost effective! 


Also, one of my favourite products for skin care that I swear by is "Clearasil Ultra Rapid Action Treatment Cream". If I have any random annoying spots that I want to get rid of I just apply a pea size amount onto the spot and leave it over night. I usually give it 1 or 2 nights and it usually does work! 

Ok so I hope some of these tips help! :) 
If you've any other questions contact us on our Elle Bee Facebook page❤ 

Love,
Betty

xoxox

Saturday, 28 September 2013

Hope you Like ❤️


Hello there,

Here's just a quick blogpost to let you know about our Facebook page where we post daily updates, tips and gold many competitions. We would absolutely love for you all to like our page and maybe even share it with your friends. Starting this blog has been amazing so far and we'd love to develop and continue on our journey, and we'd love for you all to be part of that journey. We're hoping to get back to making more youtube videos and we have so many ideas to share with all of you. We'd really appreciate your support :)

And of course we are willing to support you also. If you have a Facebook page too then we would be more than happy to like and share it on both our business and personal pages. It's great for bloggers to help each other out - give a little get a little ❤️ 

Thank you for all the support you all have given us, we really truly appreciate it.

Love, 
Elle Bee ❤️ 

Facebook: https://m.facebook.com/pages/Elle-Bee/486496721436744?id=486496721436744&_rdr

Tuesday, 17 September 2013

How to Contour, Highlight and know what Face Shape you have ❤

Hey! ❤

So later on, when I have enough free time on my hands I'm hoping to do a proper tutorial on how to contour and highlight on Youtube! But for now I said I'd do a blog post for the curious because I know before I started my make up artistry course I didn't even know what contouring was!! Basically to contour is to detract the eye from a certain area of the face and to highlight is to attract the eye to a certain area you want to enhance on the face (light attracts, dark detracts!). Although this all sounds quite simple, the main thing you need to realise is that there are different rules for different face shapes! So here is a list of exactly what you need to do for each face shape and how to recognise which face shape you have!
 
Oval face shape
This is ideally the perfect shaped face! It has:
• an equal distance from hairline to eyebrows, eyebrows to tip of nose and nose to chin
• a wider forehead than jawline
• prominent cheekbones
• an oval chin

What you should do:
Because this is the ideal face shape there is not many corrections you have to make although you can:
• apply blusher, just under the ball of the cheekbone, directly below the iris and extend it in a smooth arc towards the ears
• there's no need to contour as there is already prominent cheekbones!

Diamond face shape:
An example of someone with a diamond face shape is Victoria Beckham. It has: 
• a narrow forehead
• a narrow jawline
• is widest at the cheeks

What you should do:
• apply a highlighter at an angle/with an angler brush to both side of the forehead
• apply a highlighter(or it can be a lighter shade of foundation) at an angle from the middle to the bottom of the jawline
• Apply blush to the ball of cheek and then out towards the middle of your ear in a crescent shape. Blend

Heart
Celebrities with this type of face shape are Rihanna and Kim Kardashian. It is:
• widest at the forehead
• tapered down to the cheeks 
• narrow at the chin, sometimes pointed

What you should do:
• apply darker foundation/ bronze on either side of the forehead 
• contour under the cheekbones in an L shape 
• apply blush slightly under ball of cheek and towards the ear

Round
Kelly Clarkson is a good example of someone who has a round face shape. It's:
•width is the same as its length
•forehead is quite short
•cheeks are wide
•jaw is quite round

What you should do:
• apply darker foundation in an arc either side of the forehead
•apply darker foundation on either side of the jawline up to the tip of the ear to eliminate fullness
• blush on ball of cheek and extend outwards towards temples near the hairline

Square
Kate Middleton is a great example of someone with a square shaped face. It's:
• width of the cheeks and forehead are similar 
•forehead is quite short
•cheeks are wide
•jaw is quite round

What you should do:
•Apply a darker shade of foundation on either side of the forehead and blend
•Apply a darker foundation/ brown blush on either side of the jawline and blend
•Apply blush to the ball of the cheek and blend toward the top of the ear
•Contour under cheekbone

Rectangular/Long:
Sarah Jessica Parker is a great example of someone with a long face shape.  It's:
•Width of forehead and cheeks is similar
•jawline is quite prominent
•face is longer than wide

What you should do:
•Apply a darker foundation/brown blush either side of the forehead and either side of the jawline and blend
•Apply blush on ball of cheek and blend towards middle of ear (keep brush higher up on the cheekbones for this face shape)

These are all the basic face shapes but if you are still unsure as to which one you have you could have a mixture of two different types. The main thing to remember is to contour the features of the face you want to try to lessen and highlight the ones that you would like to enhance! :)

Hope this helps and feel free to email or write to me if you've any other questions about this! 

Love, 
Betty 

(Bee) 

Xoxoxoxoxox

Friday, 30 August 2013

Our Perfect Imperfections ♡


So we've seen this tag done a lot on some of our favourite blogs and youtube channels and we think it's time we did it. The aim of this tag is to list 3 aspects of yourself that you like and 3 aspects you don't like, and why. We all have imperfections, things about ourselves that we don't really like. But at the end of the day these imperfections are unique to us and make us who we are. We would never say we 'hate' anything about ourselves because we feel no one should ever hate anything that they were born and blessed with because all those perfect imperfections add up and make you who you are ♡

So let's get started:

Elle's Perfect Imperfections 

Imperfections:

1. My hair
Ok so I don't hate my hair at all, I actually really like it but I would love nothing more than to have long, luscious locks down to my Bellybutton. I cut my hair short back in May (hardly makes sense, I know :L), but I did it to get rid of my layers. Since then my hair has grown more than 4 inches, which is pretty amazing. If it keeps growing at this rate I should reach my goal of super long hair in no time :) But for the time being extensions shall suffice for those glamourous nights out ♡

2. My Nose
My nose is probably my least favourite aspect of myself. Again though, I don't hate my nose, it's unique to me and I love it for that but I wouldn't have chosen it myself. I would love nothing more for it to be a little bit smaller but I would never ever go through that plastic surgery thing that other people would. At the end of the day it was the nose I was born and blessed with, it does the job and I wouldn't change it for the world :) 

3. My Lips
Big, bold and luscious lips are desirable by every girl, and I'm one of those girls. Unfortunatly I'm one of those girls with small, thin lips and I'd do anything for fuller lips. Being the girly girl that I am, I'm lipstick mad and LOVE bright pinks, reds and oranges, but just wish I had the perfect lips to show off these colours like they deserve to be shown off. Nevertheless my lips are unique to me and I think they're cute, nothing a little bit of my favourite 'Pout' lipgloss and lip liner can't solve - ahhh the magic of makeup ♡

Perfections:

1. My Legs and Body
My legs are definitely my favourite aspect of my body. I was blessed with naturally  long, slim legs and I do everything I can to keep them in shape. They're one of my main areas I focus on throughout my daily fitness routine in order to keep them toned and in shape. I run, walk and do leg exercises with weights everyday. This is in no way bragging about myself at all, I'm simply just stating what my favourite aspect about myself is; I work extremely hard with regards fitness and healthy eating and I'm really happy with my results so why shouldn't I be proud of myself and happy with my body :) ♡

2. My Teeth
I've always had pretty good teeth as a child but like many teenagers I also I had to go through the annoyingly painful experience of braces. Thankfully though I only had to wear them for about 10 or 11 months, mainly because I did exactly as I was told to do by my dentist as I figured the harder I work the quicker I'll get them off, and also I was still in primary school so my appearance wouldn't have been my number one priority :L I was delighted with the results and about 2 years ago I decided to go all out and get my teeth professionally whitened using the 'Bright Smile' method, and it was the best decision I've ever made as its made such a huge difference to my face and smile ♡

3. My Skin
I suffered from eczema as a child but that cleared up very very quickly and since then I'm lucky that I've never really had any problems with my skin. Apart from a few spots every once in awhile I usually have pretty clear skin. I've never suffered from acne or anything like that so I do count myself very lucky in that regard as I really do feel for those who do and all I can say is keep constantly trying to beat it and one day you will be free from it! I do, however, have a very strict routine in how I take care of my skin and ensure to take my makeup off every night, cleanse, tone and moisturise also. I also use body lotion on my body every morning to ensure my skin is smooth and soft, and that it is cared for and treated the way it should be ♡

Bee's Perfect Imperfections 

Imperfections:

1. Definitely the fact that my hair is destroyed from dying it so much!! I've been putting highlights in my hair since I was 12 and I'm now 19! I'm trying to get it into better condition but even then it doesn't grow and I'd like to get luscious long hair like everyone else! So I'm not a big fan of my hair! 

2. The fact that I worry excessively! It's a horrible trait to have but every little thing makes me worried or stressed and sometimes it doesn't just affect me but my family and friends too!

3. My laziness! I have a love/ hate relationship with myself because I love to just chill at home doing nothing but I hate the fact that I could spend all day doing it! I wish I was more active instead of missing out on life but luckily that's something I can work on! :) 

Perfections:

1. Definitely my genetically clear skin, I barely ever break out! It's been really handy to have because I don't have to wear make up all the time!

2. I like my eyebrows! It's weird but because I have quite light eyebrows I can have my hair either brown or blonde which is really cool! :) 

3. My legs! My mam has amazing legs still to this day and she's 50+ so its definitely genetics! Thanks mam ;) 

Thank you for taking the time to read our post. We'd love to get done feedback? ♡

Love,
Elle Bee xxxx

Tuesday, 13 August 2013

Top 5 Mac Make Up Products <3

Hi guys :-)

So I've just recently finished my Diploma course in becoming a Make Up Artist and  I wanted to share with you my favourite make up products that we used during the past 6 months in this course. At the beginning of the course we received a complimentary mac make up kit worth €300 (I know cool right?!) and in it we received foundation, concealer, powder etc.. All the basic needs for a make up look! And I have to say now that I've turned Mac there's no going back for me!!! 

So here's a list of my top 5 favourite mac products and why: 

1. Mac Face And Body Foundation:
I absolutely love this foundation for 
a subtle day time look! It gives that natural look to clear skins that makes your skin look flawless! I wear it everyday and it has lasted me ages! However, even if you have oily or dry skin it still goes on quite nicely and just a bit of the MAC Select Cover Up concealer on those annoying spots and your good to go!

2. Mac Select Cover- Up Concealer
This product has worked well for me covering up spots and blemishes that shouldn't be seen! It's really effective when putting it on after your foundation and before the powder! I also put a small pea sized shape of it under my eyes to get rid of dark circles.

3. Mac Invisible Set Powder
I would recommend this powder to anybody with any skin type. It's a clear set powder that gives a matte finish. For those who have dry or oily skin this powder sets really well because with coloured powders that you can get to match your skin tone the colour of the powder can actually change if you have oily skin. So you may think your putting on one colour but it may set and turn out to be a different colour on your face! That's why I love this mac invisible set powder because it has no colour so it suits any skin! 

4. Mac Harmony Blusher
This blusher is a dark brown colour that works really well for contouring! (I will be putting up a tutorial on how to contour soon!) It should be applied after the setting powder mostly under the cheekbone and anywhere else depends on your face shape! This is a soft colour so it is not too harsh on the face but does the job of detracting light away from certain areas of the face. (Remember: Light Attracts, Dark Detracts)

5. Mac Hug Me Lipstick 
This lipstick is a brilliant colour for daytime wear. It is a subtle wear and always like to wear it with brown eyeshadow! Also the great thing about this lipstick is if you mix it with the Mac Select Cover up Concealer it greats a nude lipstick that goes really well with smokey eyes! 

So, That's my 5 fav mac makeup products :-) hope you enjoyed ;-)

Love,
Betty (Bee)
Xxxx

Tuesday, 6 August 2013

Elle's Morning Routine ♡


Hello Dolls ♡

Today I'm here to share with you my morning routine. If you know me you'll know I'm an early bird. I have so much energy in the morning it's insane! My day begins usually between the hours of 7-8am. When I wake up I usually lie in bed and chill with my iPhone for about 5 or 10 minutes, checking up on all the latest on Twitter, Facebook and of course Pinterest ♡ 
Once I get up my bed HAS to be made! When it comes to my room I am an organized freak, everything has to be clean and organized at all times! 
I go straight downstairs and cuddle and play with my puppy for about 10 minutes. I'm usually one of the 1st people up in my house so Harry is usually very excited to see me! 

Provided the weather is good I usually slip into my workout gear and head out for a short 10 minute walk, sometimes I bring harry, to help wake me up and to breathe in some fresh morning air. I love the feeling of a morning walk, watching the world pass and seeing everyone go about their own morning routines. When I get home a cup of tea is the number 1 priority, sure hey that's what makes me Irish :D 

I then head upstairs and start on my morning fitness routine (which I have wrote about not so long ago).
Once that's done, I head for a nice long hot shower. I tend to spend a long time unecessaryily in the shower. I wash my hair twice using whatever shampoos in the shower. At the moment I'm using Herbal Essence manderian shampoo and conditioner (which smells totally amazing btw). I apply my conditioner to the ends of my hair only and brush it through with a wide tooth comb. I leave my conditioner in while I wash my body with my all time favourite shower cream, Doves pampering Shea Butter and Warm Vanillia - smells absolutly gorgeous ♡ 

Before I finish up in the shower I always blast freezing cold water on myself, I read somewhere that it's good for your hair so I've been doing it for a good few years at this stage.

After my shower I always apply body mousturizer, at the moment I'm using Just Desserts Strawberry Cheesecake which I purchased 2 for £1.50 in Beauty Base while I was in London (brilliant store!!) - this smells amazing!

I spray my hair with Revlon Keratin Enriched Detangling Conditioner and Schwarzkopf BC hair therapy oil and then comb through with a wide tooth comb.

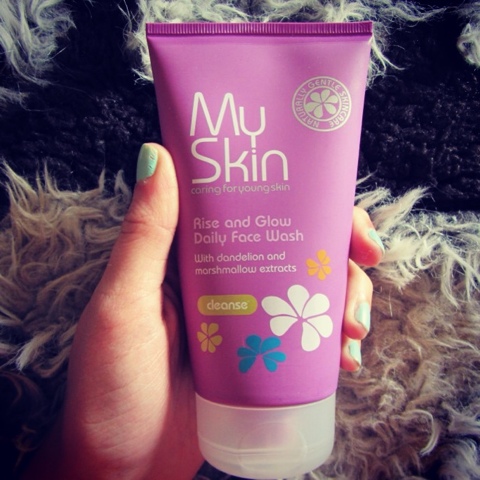
 I wrap my hair up in a hair towel after as I feel this leaves my hair feeling much healthier and softer. I then begin cleansing, toning and moisturizing my face using Kaeso Hydrating Cleanser, Toner and Mousturizer which can be purchased at any salon supply shop, and I also finish by washing my face with My Skin Daily Face Wash. 


Now on to my everyday makeup routine (I hope to do a video turtorial soon but for now..) ♡ I begin by applying NUXE oil to my face, I find this brilliant as a foundation primer as it soaks straight into your skin leaving it soft and smooth for easy makeup application. I purchased this in a local chemist, it costs about €31.95 which is quite pricey but worth it! I also find other inexpensive body oils do just as good a job too :) I also have macs prep and prime primer but I try to only use that for night time makeup, etc. Now on to foundation; my everyday foundation is Mac's face and body in the colour N2 which I apply with Mac's 187 stipple foundation brush, I find this a great everyday foundation as it has very light coverage and looks very natural. I then contour my face using Honolulu bronzer underneath my cheek bones, along my jawline and on my temples, which I purchased in a local chemist for €5.95, and Make-Up's glow up highlighter on the bridge of my nose, under my eyes and centre of my forehead. I then begin on my eyes using my Naked palette, I use Virgin under my brow bone, Sin on my lid and Buck on my crease and I blend. Using maybelline's Eyeliner gel and an angled brush I line my eyes and sometimes I create a flick. I curl my eyelashes using an eyelash curler I purchased from Forever 21 and apply 2 coats of Benefits 'They're Real' mascara. Using my HD Brow palette I then fill in my eyebrows lightly to give them some definition. I then apply my mint balmi lipbalm to my lips and I'm good to go!

http://m.youtube.com/watchfeature=plcp&v=W2qnr5h5GGk


It's then time to pick out my clothes; depending on the weather I usually opt for a cute pretty romper or leggings/jeans and a cute top. 
Taking the towel from my hair I then begin blow drying my hair using my Parlux 2800 hairdryer which I purchased from my hairdresser and a large round brush. I then run my GHD quickly through my hair and I'm done; ready to have a good day ♡


I hope you enjoyed this blog post, I'd love to hear some feedback in the comments below.

Love,
Lorna ♡  
Xxxx

Tuesday, 30 July 2013

How to put on fake eyelashes.. The best way!

Ok so it's always been a struggle for me and I'm sure many others putting on eyelashes and getting them to stay on!
So here's a guide to help you put them on the best way.
Strip Lashes:
Any type of lashes you buy are usually fine! (Ones from Penneys/ Primark, Tesco, New Look wherever!) I personally prefer the ones that are less thick as opposed to the heavier strip lash! The most important thing to have when putting on both the strip lashes and the individual lashes is a tweezers.
So,
Firstly take the first strip lash out of the packaging gently by picking it up with the tweezers. Then measure it to your eye. Most strip lashes are made especially for the perfect shaped eye which is the almond shaped eye. There are many different shapes of eye which is why If you do not have this shape eye the lash line will need to be cut. To do this just simply get a nail scissors or any small scissors and cut off the part that goes over your natural lash line. Do not do this after placing it on your eye because you could cut off some of your own eyelashes!! 
When you have got the perfect shape simply bend the strip lash a few times with your fingers so as to get rid of the shape that was designed for that almond eye. This will make it easier to fit it on to your eye.
Then, place the adhesive glue which should have come with the lashes onto the strip and wait a few minutes for the glue to dry in. Try not to get glue on the lashes just on the strip that will be placed on the lash line.
Once the glue has dried (it should take two minutes at the most) pick up the strip lashes with the tweezer and place gently on the natural lash line (the area where the eyelashes meet the skin). Press the fake lashes in gently with the back of the tweezers. This is the best way to do it so your not left with any bits poking out! 

Individual Lashes:
Firstly, put a blob of the adhesive glue that should have come with the lashes on the back of your hand.
Pick up the first lash (the longest one in the packet) with a tweezers and dip the tip of the lash onto the glue on your hand. Place it on the lash on the outer corner of the eye. This is where you will start from (the outer lashes in towards the inner ones). Place the lash gently on the start of the natural eye lash (the part where the eyelash meets the skin). Do this with the rest of the eyelashes and work inwards! 

Hope this helped! Video tutorial to come soon!!
Bee xxx


Saturday, 27 July 2013

HD Brows - My Experience


So today I got the famous HD Brows done. I've been looking forward to this all week. On Tuesday I went in to book my appointment and had to do a patch test for allergy purposes and was delighted when I showed no signs of allergies :)
Anyways, I'm here now to share my experience of my 1st HD Brow treatment. To start, it was nothing like I expected, it was incredibly relaxing. It began by the girl kindly talking me through each of the steps she would be taking in achieving my HD Brows and she asked me if I had any particular brow shape in mind that I would like, but I didn't so I left it up to her. She informed me of the goal of HD Brows which is to make the most of the your own brows. She explained to me that it was a process rather than an immediate change which I originally thought. There was beautiful soft and relaxing music playing in the background as she began the process. She began by measuring my eye brows and marking areas to ensure both brows would be the same the shape. She waxed the overgrown areas of my brows and she then began to thread my eyebrows. Threading is a technique which I have never experienced before and is extremely relaxing. Before applying the dye to my brows she kindly let me have a look to see if the brows were to my liking, which they were. When she was finished she handed me a mirror to talk me through the next steps in my process. She explained to me the areas of my brows in which she wanted me to grow and the areas in which she wanted me to keep plucked and clean. She then introduced me to the famous HD Brows palette and showed me how to use it to enhance my overall brow. She explained to me that soon enough my brows would be full and perfect and there would be no need for me to use any form of eyebrow powder or pencil. She asked me if I would like to purchase the HD Brow palette for only €25 and I was delighted.
Overall I was extremely delighted with the results I gained after only one treatment, and I'm excited for my next treatment in a couple of months time. HD Brows make a huge difference to a persons face shape and overall appearance, complimenting their prime facial features. At only €35 per treatment it's a bargain! 

Before and After 


HD Brow Palette